Ever wondered how to create an Outlook distribution list and track every email that you send to each person from the list? Learn how to create an Outlook distribution list and how to send personalized emails to all your employee distribution lists.
Well-maintained distribution lists are crucial for the success of your internal communications strategy. But what if you could leverage your existing distribution lists for even greater control over employee engagement? With ContactMonkey, you can.
Using ContactMonkey, you can add personalized subject lines and body copy based on the recipients in your distribution list. You can also track and compare email metrics across your organization to get a clear idea of your employee engagement situation.
Mettler Toledo, a precision instrument manufacturer, was able to use internal email segmentation to reduce the number of emails being sent each year. They were also able to use ContactMonkey’s internal email platform to increase their email open rate by 33% for their most disengaged contact list. Get the best from your Outlook distribution lists by using ContactMonkey.
Book a demo to see how you can use ContactMonkey’s employee email solutions to create distribution lists, and personalize content with ease with audience segmentation features.
What is An Internal Email Distribution List?
Imagine sending a new employee welcome email or a change management update to 1,000 different contacts using the CC (carbon copy) feature. It would be a headache to say the least.
The way to avoid this is to use an email distribution list. This is a single group of email recipients that you connect with on a regular basis. Your Outlook distribution list group is addressed as a single recipient, so the process is as easy as sending an email to one person.
What are Email Distribution List Best Practices?
Internal email distribution lists are an easy way to speed up information flow across your organization. But in order to get the most out of your email distribution list, it’s important to keep in mind a few employee engagement best practices. Let’s break it down:
- Promptly comply with removal requests if an employee provides you with a reason.
- Clean up distribution lists on a regular basis and remove defunct email addresses. This post will cover how to edit distribution lists in Outlook.
- Put security and confidentiality first by double check if what you’re sending is okay to be viewed by a large group.
- Don’t overwhelm people with information—determine what needs to be sent to the group versus specific individuals.
- Write conciselyif you want more people in your distribution list to actually finish reading your post.
- Be cautious of ‘Reply All’ messages when engaging with an email distribution list. If you notice this happening a lot, add a disclaimer at the top of your message asking respondents to avoid hitting “Reply all” and reply individually to the sender instead.
What Types of Distribution Lists Can You Create in Outlook?
When you’re creating your distribution list, you should think about your company’s structure. Here are some basic ways to think how to create a distribution list in Outlook:
By geographic location (ex. Downtown Toronto HQ, North Toronto Office, Dublin Office, Seattle Office, etc)
Not only is this important from an office management perspective, but this can also be particularly handy in case of a disruption or emergency. For instance, scheduled fire alarms, transit closures, or extreme weather accommodations are better announced on a location by location business – especially if you have multiple locations in the same city.
Have offices in different countries? You definitely want them segmented so you can better cover holidays or any national trends impacting work.
Organize your contacts with list management
Save time managing employee lists by syncing everything in one place.
Learn more

By job function or department (ex. Customer Support, Account Management, Onboarding, etc.)
This might be a no brainer, but there will be times a message is only relevant to certain employees. Your sales team doesn’t need to know about an announcement for your factory workers, and vice versa.
Hierarchy or seniority (ex. Team Leads and higher, Senior Management, Department Heads, etc)
Not all executive communications need to be a company-wide memo to staff. It may suffice to send important communications to managers only. Especially if not every employee has email, this is important to ensure the correct level of management gets the information they need.
Language (Eg. All Spanish Speaking Employees)
Another obvious employee newsletter idea: if you have offices all over the globe you want to be sure you’re sending your newsletters in the correct language. Even if English is the default language of your business if there’s a region (or regions) where the primary language is different you should offer a translated version. People will be more engaged when you speak directly to them. Plus, you minimize the risk of your message being misunderstood or misinterpreted.
Dividing different employees into various Outlook Groups or distribution lists is an effective way for you to manage all the different employee emails you send out to different mailing lists. This is imperative if you’re planning to personalize each email to suit the recipients of a specific country or region. ContactMonkey also offers a multi-language feature to help with this.
How to Create a Distribution List in Outlook
If you’re unfamiliar with how to set up a distribution list in Outlook, don’t fret. We’ll break down the process for you step by step:
Step 1
The first thing you will need to do is open your Office 365 or Outlook 365 app on your desktop and locate your Address Book.

Step 2
After you locate the “Address Book” and click on it, a dialogue box will pop up. Click on the “File” button and from the drop-down menu, hit “New Entry.”

Step 3
After you hit “New Entry,” it will lead you to another dialogue box. All you have to do now is click on “New Contact Group” and hit OK.

This will take you to a new window. You can then click on “Add Members,” and hit “From Address Book” from the drop-down menu.

Step 4
You’ll now be able to go through and select the Outlook contacts or members that you want to include in your Outlook distribution list from the new pop-up dialogue box. Double click on each name so it appears in the members field.

Step 5
Once you’ve selected the members from your Outlook contacts, you can then go ahead and name the Outlook group or distribution list.

Step 6
After naming the group, click on “Save and Close” to save the distribution list.

Whenever you need to send a new email to your saved Outlook distribution list, all you have to do is click on “New Email.”

This will open up a new dialogue box for you. Type in the name of the distribution list you just saved in the “To” field.

Now you’re all set to send a mass email to your newly created Outlook distribution list.


How to Edit and Update a Distribution List in Outlook
If you work for a large company, chances are staff changes are a regular occurrence. New hires, name changes, and promotions happen all the time. That means you’re going to have to add, remove, or edit users in your Outlook distribution list at some point.
You may be wondering how to remove or add someone new to your Outlook groups or Outlook distribution list. Well, the good news is it’s super easy to edit a distribution list in Outlook. And we tell you exactly how to make changes to your distribution list below so no need to fret.
That said, there’s also a handy little thing called dynamic distribution groups which update automatically when your contact list is updated. Dynamic distribution groups include filters using tags, such as “job title” or “location” so you don’t have to manually update your distribution lists every time someone’s position changes. Dynamic distribution groups can only be created in Microsoft Exchange.
Method 1: Editing a Distribution List in Outlook
Now that you know the overview of how to manage a distribution list in Outlook, let’s look at the granular steps:
Go to your Outlook 365 app and open it.
Click on “New Email.”

In the dialogue box that appears, write the name of the Outlook Group or Outlook distribution list you want to edit.
Enter the group in the “To” field and right click on it. This will lead you to a new drop-down menu and you can simply select the “Edit Contact” option from here.

This will take you to a new window, showcasing all the members within that specific Outlook Group or Outlook distribution list. To remove someone, click on the name of the person you want to remove and then click on “Remove Member.”
If you want to add a new member, simply click on “Add Members” besides the “Remove Member” button and you can add anyone else you want to include in the distribution list.

Method 2:Editing a Distribution List in Outlook
Go to your Outlook 365 app and click on “New Email.” This will open up a new dialogue box.
All you have to do now is hit, “Address Book” and click on the menu button under “Address Book.”
Make sure you select “All distribution lists” or “All Contacts” from the drop-down menu. This will take you to all distribution lists or Outlook groups you’ve created.

Click on the one you want to edit. Easily add and remove members from a specific Outlook distribution list or Outlook contact group. Easy enough, isn’t it?
How to Share Your Outlook Distribution List by Email
But what if you want to send your distribution list to a colleague? It’s super easy to learn how to share a distribution list in Outlook and send it as an attachment!
Click on “New Email” after opening your Outlook 365 app on your desktop. From the new pop-up window, click on “Attach Item” and then select “Outlook Item” from the drop-down menu.

A new window will pop-up and you can scroll down the options to click on “Contacts.” This will show you a list of all your distribution lists or Outlook groups and you can select the one you want to attach by double-clicking on it.

Your Outlook distribution list or Outlook group will then show up as an attachment and you can send it to whoever needs to access the list.

Advantages of Using ContactMonkey for Your Outlook Distribution Lists
Personalization
Who doesn’t love personalized messages? I know I’m more likely to open a message that says, “Hey Filza” in the subject line rather than something generic.
Send directly to your existing Outlook distribution lists or dynamic distribution groups. Having IT troubles accessing your lists or maybe they are outdated? Simply upload and send directly to a CSV file or sync with your HRIS such as Workday.
Uploading CSV files will also enable you to supercharge email personalization for each region, department and employee! This is a great way to step up your employee onboarding process by giving new employees a warm welcome.
Not sure what kind of content to include in your email? Using ContactMonkey’s OpenAI ChatGPT integration, you can provide a prompt and customize the generated text according to your audience. Use this integration to gather new email ideas and beat writers’ block.
Modern internal comms and measurement tools
No design or technical expertise needed. Save time, increase engagement, and dazzle your employees with fun and interactive communications.
Explore all features

Track Engagement: Open Rates, Click Rates and More
Another advantage of using your distribution lists with ContactMonkey is that you’re actually able to tell who engaged with your internal emails.
You can get stats on who opened your email, when, on which device and at what time. You will also know which links employees clicked on the most and which ones received zero engagement.
You can use this information to optimize all your internal emails, develop better employee recognition ideas, and use subject lines that actually work to boost employee engagement and retention.
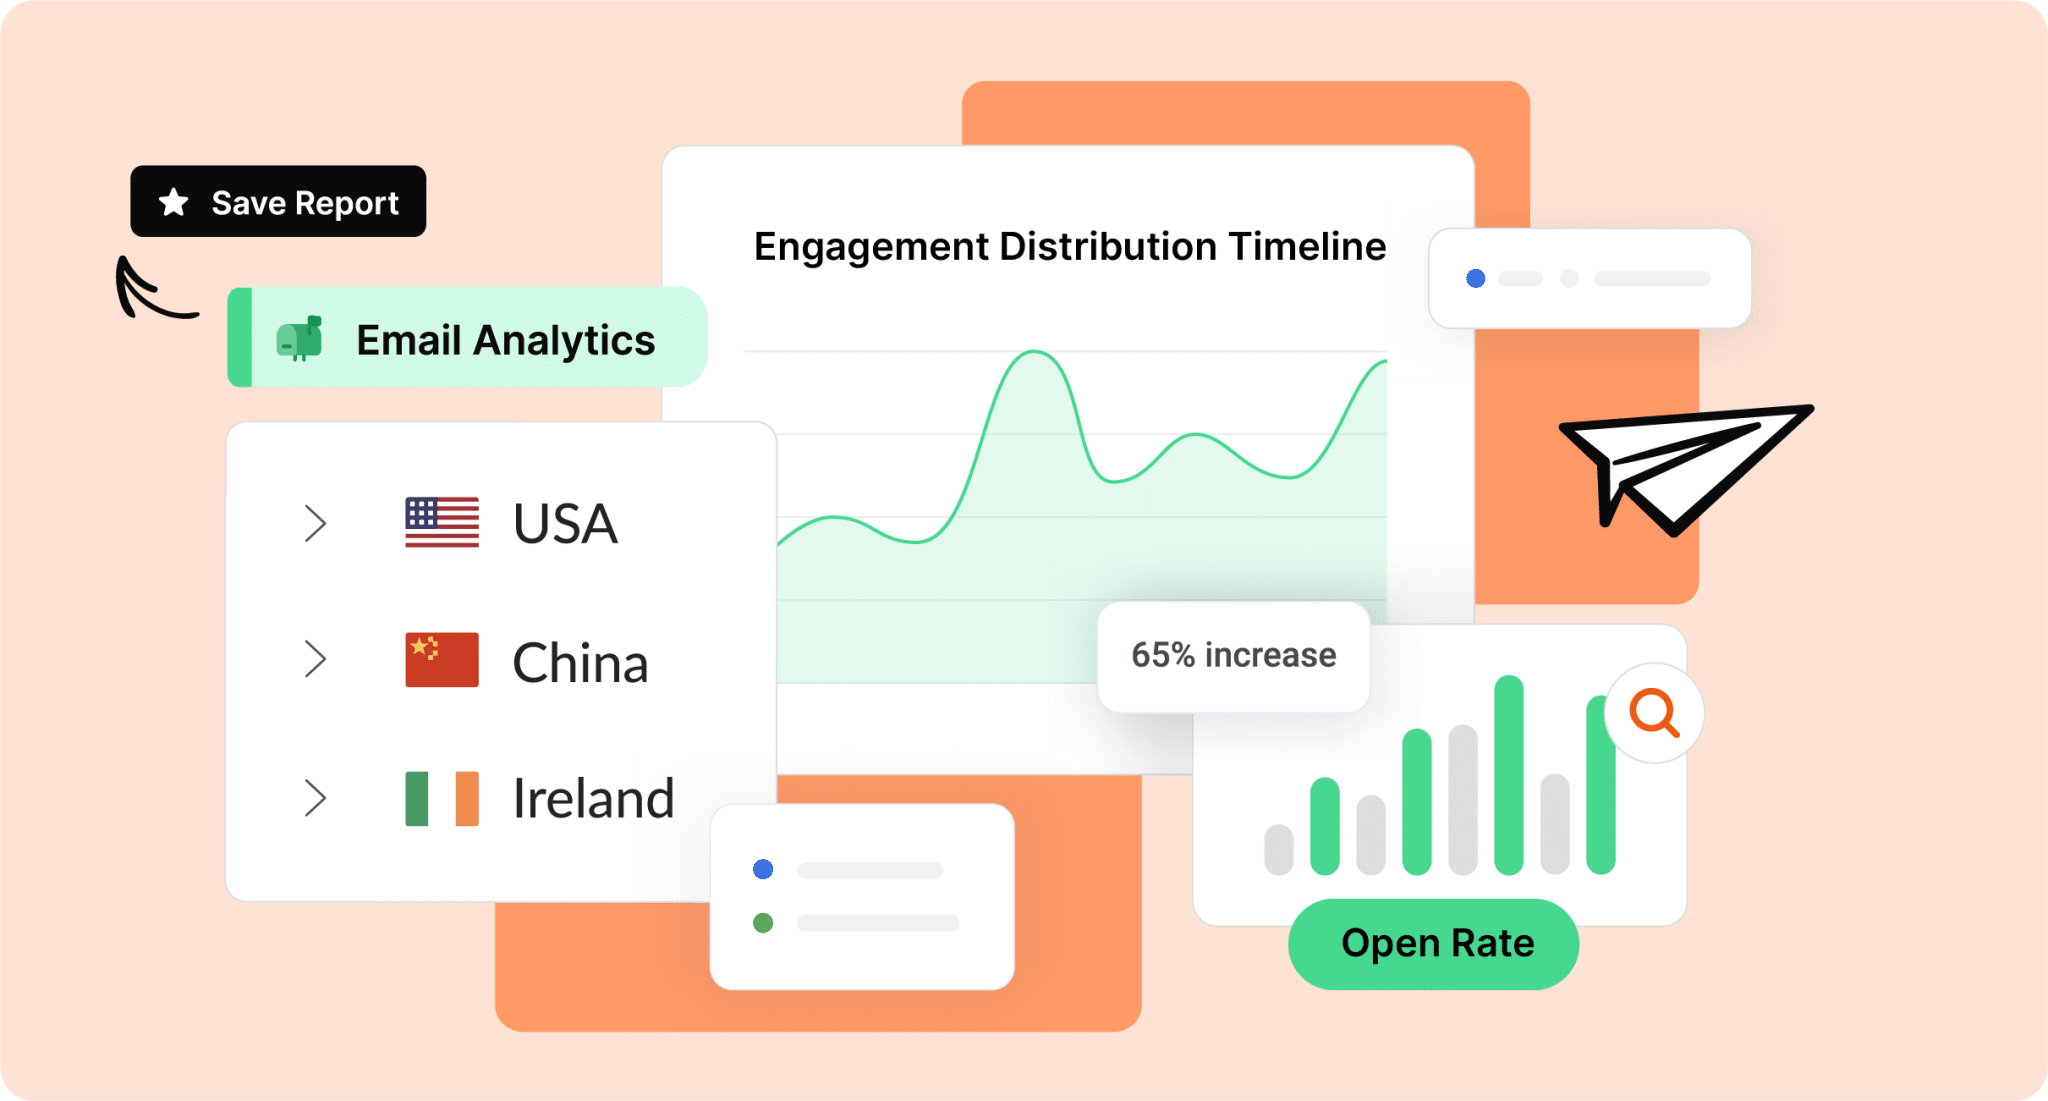
Email Analytics Dashboard
Track emails on an individual employee or overall campaign level all within Outlook. Use real-time email metrics to identify your team’s best performing subject lines, best times to send email newsletters, links, and most engaging content:

Having real data behind your internal communications can help show the positive impact you provide and the importance of employee engagement. Learn more about the advanced Outlook email analytics that you get with ContactMonkey.
You can further increase email engagement by targeting relevant groups of employees by using custom email lists. Using ContactMonkey’s List Management feature, you can create custom email lists—without needing IT approval—that will automatically update after integrating with your Human Resource Information System (HRIS) like Workday or ADP, or Azure Active Directory.
Send Responsive HTML Emails
With ContactMonkey’s email design software, you also have the ability to create and send responsive HTML newsletters to your Outlook distribution lists. If you have a remote or hybrid workforce, a remote teams communication tool like ContactMonkey is essentially a best practice for email newsletters.
Create responsive HTML employee newsletter templates with an easy to use drag-and-drop email template builder:
With our new features for Outlook business email now you can add emoji reactions, pulse surveys, eNPS surveys, thumbs up/down and more to the content in your internal emails. Simply drag the respective block anywhere you want in a pre-built or new responsive Outlook email template—which can easily help you meet your pulse survey objectives.
Get Real-Time Employee Feedback with ContactMonkey’s Internal Email Tracking Tool
If you’re an internal communicator and you’re not using distribution lists, perhaps now it’s time to consider starting. Now that you know how to create a distribution list in Outlook, edit it, manage it, and share it, you can easily implement distribution lists in your business.
And what better way to start than with a purpose-built employee communication platform like ContactMonkey. Easily manage your distribution lists and leverage them with great ContactMonkey features to improve employee engagement.
So, what are you waiting for? Start tracking your internal distribution lists from Outlook today! Book your demo and see how ContactMonkey helps you send personalized messages to your lists, track every open and link click.


 1")